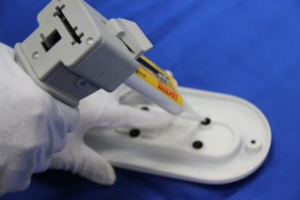
Injection molding remains the life blood of large scale plastic manufacturing operations. Because of the heavy capital investment required for molding operations, 3D printing and other solutions are usually employed for prototyping and testing. With 3D printing, you can get the design basics, functionality and aesthetics evaluated at a significantly lower cost than injection molding.
So, what then happens when your 3D printed design checks out? Today, we take a look at how to transit your design for 3D printed prototypes to the use of injection molding operations for making final parts. Before we jump right in, let’s summarize some injection molding basics.
Understanding Injection Molding and Its Design Basics
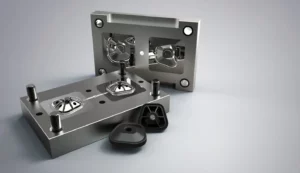
The basic principle behind the injection molding operation utilizes pressure and heat to inject a material into a cavity where it forms the desired shape and cools thereafter. The process generally entails the use of mold halves wherein resin material is melted and injected into the cavity. The liquid material or resin, fills and takes the shape of the cavity. The process creates a lot of heat that aids the forming of the part. After the part has been formed, it begins to cool and solidifies. After cooling, the final part is ejected, and the injection molding halves separate again at the mold parting line to restart the process. The mold themselves represent a “negative” orientation of the part.
Injection molding operations may get complex when the part geometry isn’t as straightforward. When dealing with complex geometries, the injection molds will be designed with screws, slides or actions that facilitate the formation of complex shapes. The design of your part can be a significant determinant of the cost of your mold. Molds that require “action” always have relatively higher (up to 10x more) landing cost than simple “straight pull” molds.
Transiting to Injection Molding
Using DFM to make life easier
DFM refers to Design for manufacturing. Every class of production technology works in accordance with the design guidelines for its processes. For instance, we have design for 3D printing and design for injection molding. Because these processes are entirely different, the design guidelines for them will also be different.
To ease your design transition to injection molding, adhere to the design for injection molding guidelines and other rules like avoiding undercuts, using fillets, incorporating a draft angle and more.
Avoid undercuts
Undercuts exist when one part of your part geometry lies beneath the other. They are used to facilitate the removal of the part or formation of the desired geometry when either half of the mold would keep the part trapped within the mold. Undercuts are quite stressful and expensive to incorporate into your part production. In fact, when you evaluate your injection molding design, the presence of an undercut feature will be one of the highest cost points. This is why it is widely advised to do away with any type of undercut.
Use radii and fillets
Add radii and fillets to your design to ease part ejection and prevent defects to your finished part. Sharp corners are only applicable when the corner is also the parting line of the mold, formed form either half. Like 3D printing, the use of radii or fillets also helps to reduce stress concentration in corners and improve the shock absorbance of the part.
Use a draft angle
Draft angles or taper are necessary for smooth ejection of your part post-molding. Because 3D prints are designed to be built from the ground-up, there is usually no draft in the design. If your mold has straight sides that are in the same orientation and direction as the direction in which the mold moves (mold pull), then you will need to draft or taper the part. The draft angle can be as minimal as 1 or 2 degrees. This amount of draft will be almost unnoticeable. There is a directly proportional correlation between the length of your straight sides and draft angle.
Uniform wall thickness
The importance of uniformity in wall thickness is already emphasized in 3D printing. In injection molding, the series of heating and cooling calls for even more consistency in wall thickness. The cooling phase is between the injection and ejection stages. Inconsistent wall thickness will affect the rate of cooling, and because molded plastic will shrink after cooling, the rate of shrinkage is also affected. To prevent defects like sink marks, keep wall thickness uniform throughout your part. Also, ensure that there are no step transitions across cross-section areas in your part design.
Dealing with complex geometries
When dealing with parts with complex geometries, injection molding is more complicated than 3D printing. Because of the use of advanced CAD design files and software, 3D printing can easily make parts with complex geometries. For injection molding, the solution is to either use multiple actions in the design of the mold to make complex features, or to try to break down your complex part into two or more simpler parts. The former is significantly more expensive than the latter. To cut cost, break your part into simpler units. These parts can be ultrasonically welded or assembled with adhesives, snap-fits, screws and threads to make the final part that will function and look as intended.
Back to 3D Printing
As we get closer to the injection molding runs, you will need to back track to 3D printing. Use PolyJet 3D printing to prototype your new design with materials that share the closest properties to the final part. If you have broken your design into smaller units, remember to make allowances for your sectioned parts to come together smoothly.
After 3D printing your most recent iteration of your design, perform some testing to evaluate design and functionality. Once everything checks out, you may now proceed to mass production through injection molding. Injection molding typically caters to volumes around 5,000 to 10,000. If you need anything in between, our low-volume production runs can make 100 to 1000 parts for you through urethane casting processes.